Product

Vinyls

Vinyls

Easiflooring Product Vinyls

Budget Friendly

Vinyl flooring is available in a range of prices to suit almost any budget.

Soft & Waterproof

Vinyl flooring is probably best known for its waterproofing qualities and soft touch.

Wide Colour & Texture Ranges

Vinyl flooring comes in a wide range of colours, textures and patterns and is also easy to maintain.

Versatile

Vinyl flooring is a popular flooring option for homeowners, especially in moist areas, such as kitchens and bathrooms. Vinyl is versatile, providing water and stain resistance along with long-term durability. Vinyl is not only an attractive choice but also one that will not break the bank for any remodel. If you are looking to install sheet vinyl flooring in your home, contact us in any way you find most accessible, and our experts will help you get the right flooring for your needs.

Easy Maintenance

Call us today to begin the journey toward the easi-vinyl floor you have always wanted. Experience the easy maintenance, durability, and unlimited design possibilities that Easiflooring can offer you. Our experts are waiting to guide you to the flooring of your dreams!

Easiflooring Product Vinyls

Vinyl Installation

Step 1 - Choosing the Best Vinyl Flooring

Easiflooring offers many vinyl brands. Vinyl flooring comes in two types, which are differentiated by their backing: felt or fiberglass. Felt has been the more popular of the two, but new fiberglass options offer more durability and better comfort. Both types have a vinyl design layer covered by a protective clear vinyl layer and topcoat, this allows for scratches and scuffs resistance as well as easy cleaning. When ordering vinyl, accurate measurements are vital. If the measurements are inaccurate you could end up short on material.

Step 2 - Getting Rid of Any Obstacles and Existing Flooring

The first step of the actual installation is to remove all obstacles in the room as well as the existing flooring, this includes mouldings.

Step 3 - Preparing the Sub-Floor

Vinyl flooring must be installed on a flat, smooth surface. This is not always possible on the existing sub-floor especially after the old flooring is removed. To combat this our installers generally smooth out the surface or use self-levelling screed to even out the sub-floor.

Step 4 - Preparing Precise Measurements and Placing an Underlayer

After the sub-floor is corrected it is time to install the underlay, which depending on what the sub-floor made of will be smooth to varying degrees. This underlay needs to rest in your home for a minimum of three days to acclimatise to the environment. If this step is omitted, it could lead to the flooring lifting over time. The underlay must be installed properly to avoid bumps becoming clearly visible on the finished flooring. This method can vary depending on the  sub-floor.
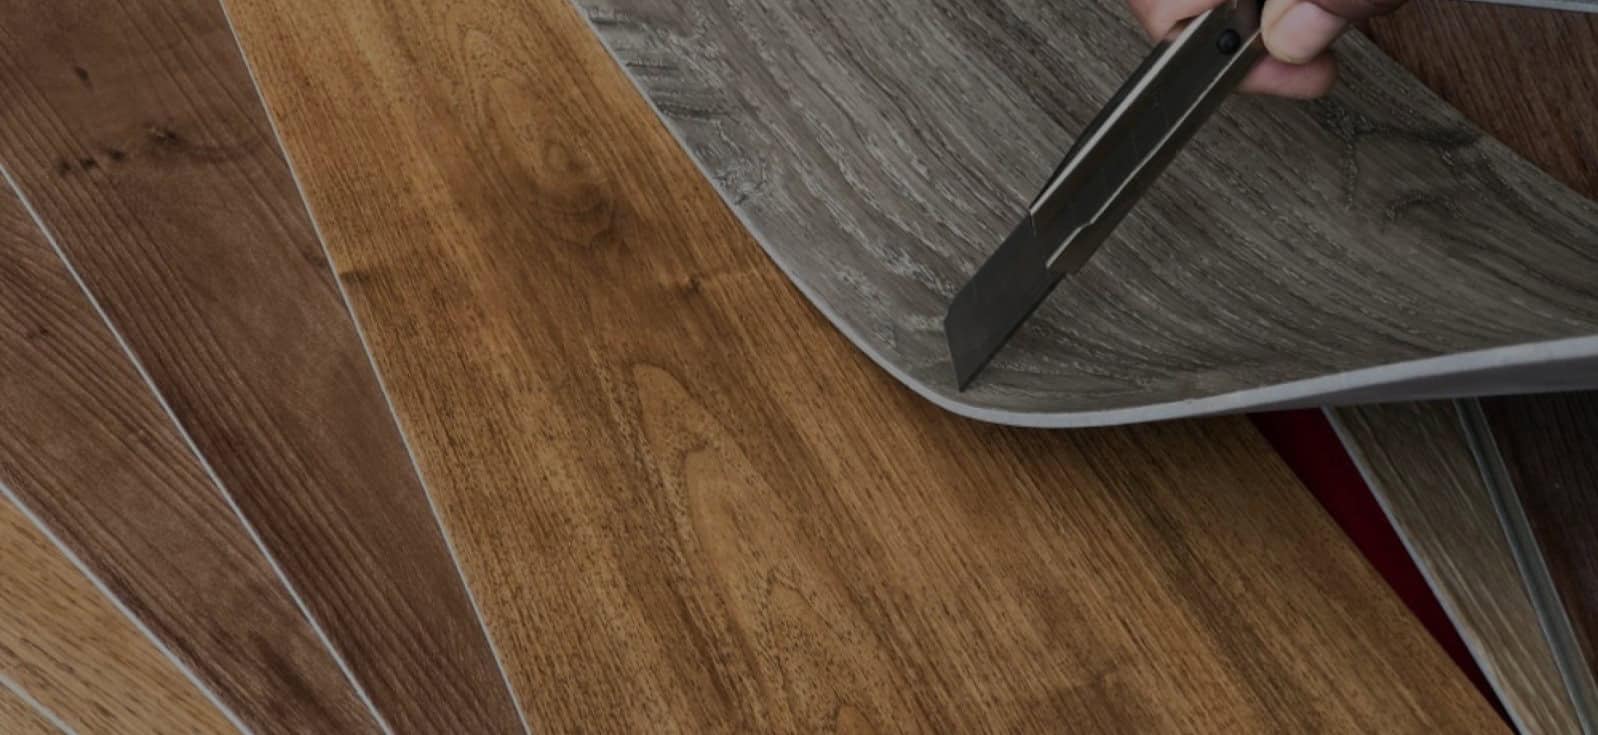
Step 5 - Putting Down the Vinyl Flooring

Your vinyl flooring may come in sheets or square tiles. Vinyl sheets are cut similarly to carpet, while square tiles are applied in a pattern of some kind. Most square tiles come with an adhesive backing and are self-stick, while vinyl sheeting must be glued down.

Successfully installing vinyl flooring is contingent on firm adhesion of the vinyl to the underlayer, this is done with a floor roller to create a secure bond. After the glue has set for several hours the mouldings and other furniture can be replaced in the room.

Vinyl Maintenance

Before moving heavy objects across the floor, always lay a plank or firm sheet to disperse the weight. Before placing any chairs or furniture on your new vinyl floor always check the condition of the legs to prevent any potential cuts or scratches.

Never push, pull, or drag furniture across vinyl floors. Always lift and carry.

Remove dust, sand, and grit particles by sweeping or vacuuming your vinyl floor regularly. Do not use a vacuum with a beater as it may scratch your floor.

When sweeping or vacuuming does not remove the dirt, mop the floor with clean warm water. If water alone does not clean the surface, use one teaspoon of dish washing liquid to 500ml of warm water and apply with a soft sponge. Rinse thoroughly with fresh water to remove any residue.


Be careful not to allow too much water to seep between the joins as it could emulsify the adhesive.

Finally, think prevention. Place non staining, walk off mats at every outside entrance to your room. This will help keep sand and grit from being tracked onto your floor in the first place.

Just be sure to avoid using rubber backed mats as they can damage and potentially discolour your floor.

Easiflooring
Easiflooring
Easiflooring Product Vinyls
Easiflooring
Easiflooring
Easiflooring Product Vinyls
Scroll to Top